STEP1: Launch an Amazon EC2 instance, First, log in to the AWS management console and from EC2 dashboard. select the launch instance and create a new instance using the CentOS

click on select button.
STEP 2: Choose an instance type
On the Choose an Instance Type page, the t2.micro instance .this instance type to stay within the free tier.

click on review and Launch instance
we just skip the other 3 to 6 steps.
STEP3: Review Instance Launch page

On the Review Instance Launch page, click Launch.
STEP4: Create key pair
In the create a new key pair dialog box, Create a key pair using Amazon EC2

don't forget Download key pair , and click on Launch button.
note: keypair helps to connect your instance
STEP 5: view your ec2-instance

STEP 6: Connect your EC2-instance
After launch your instance, you can connect to it.
the easy way to connect your instance (select instace and click on connect button)

next , click on connect button
connect your instance in your browser tab.
STEP 7: Download and install Jenkins
we are going to run jenkins commands step by step, which are required to install Jenkins on a centos machine and one important think is Jenkins is a Java application, so the first step is to install Java.
a) install java
Run the following command to install the OpenJDK 11 package.
java -version

b) install wget package
we need to install wget package, run the below commands
c) Add the Jenkins repo

d) Add jenkins key file
Import a key file from Jenkins-CI to enable installation from the package:
e) install jenkins
run the jenkins instalation commands
yum install jenkins

f) check the jenkins status
To start the Jenkins service and enable it at startup, enter the following:
sudo systemctl enable jenkins
To display the status of the Jenkins service

jenkins install successfully.
STEP 8: Configure and Set up Jenkins
a) change EC-2 security Group
Jenkins is now installed and running on your EC2 instance. To configure Jenkins:
First , we have enable the jenkins port
goto ec2 instance --> select your instance security Group--> click on edit inbount rule
note : jenkins default port is 8080

b) check and view the jenkins
next, Open a web browser, and enter the following URL
enter your puplic ip:port
http://18.118.16.101:8080/

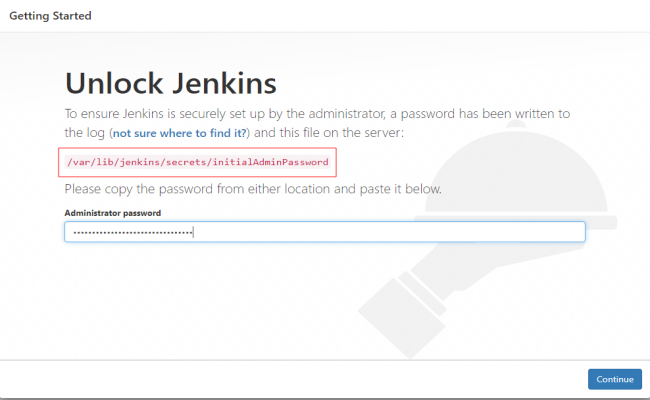
The browser should display an Unlock Jenkins page.enter the password found in /var/lib/jenkins/secrets/initialAdminPassword

c) view jenkins password
Goto ec2 instance terminal , enter the below command

to view your jenkins password (copy the password), paste the jenkins unlock page
d) install jenkins plugins
Jenkins will prompt you to install plugins.

e) view the plugins instalation process
Once the installation is complete, Create First Admin User, click Save and Continue.

f) create admin user
next, create first Admin User, fill your details

then, your jenkins setup is completed , just select start using jenkins
g) jenkins start page is ready state

h) jenkins home page
This step takes you to the Jenkins dashboard where you can create new jobs.

that's it


Comments (0)